MACRO MONDAYS -- Yesterday's Lily Filaments and Nuts in a Lightbox
posted by micki at 1/15/2007 11:46:00 AM
![]()
posted by micki at 1/15/2007 11:46:00 AM
![]()
No digital photography here folks. Only film, all the time. No post processing. I shoot it, I have it developed, I scan the print, I post it. It is hoped that you would respect my ownership of the images posted, despite the ease with which you could copy them. If you would like a true photographic print of any of my images, please contact me at goodiesbaker@yahoo.com and I will be happy to provide you with one. Weapons of Choice: * Minolta 7000 * Minolta 9000 *Minolta Dynax 9 * Konica Minolta 70 *Minolta x-700 * Minolta AL-F Rangefinder *1958 Minolta Autocord *Holga *holgamod Holga *PIX Panorama Toy Camera *Polaroid One Step Close Up Lenses: Too many too list, just read the stats for each shot I post Scanner: Epson 4990 Perfection Photo Favorite Films: * Kodak Tri-X * Fuji Superia * Ilford HP5+ -- Goal: To make the best exposure possible, on film. A Theme a Day *Sunday – Take A Guess *Macro Mondays *A Glimpse of My Town Tuesdays *Wednesday's Colors *Thursday's Critter *Unique Film and/or Camera Fridays *Saturday – Anything goes


18 Comments:
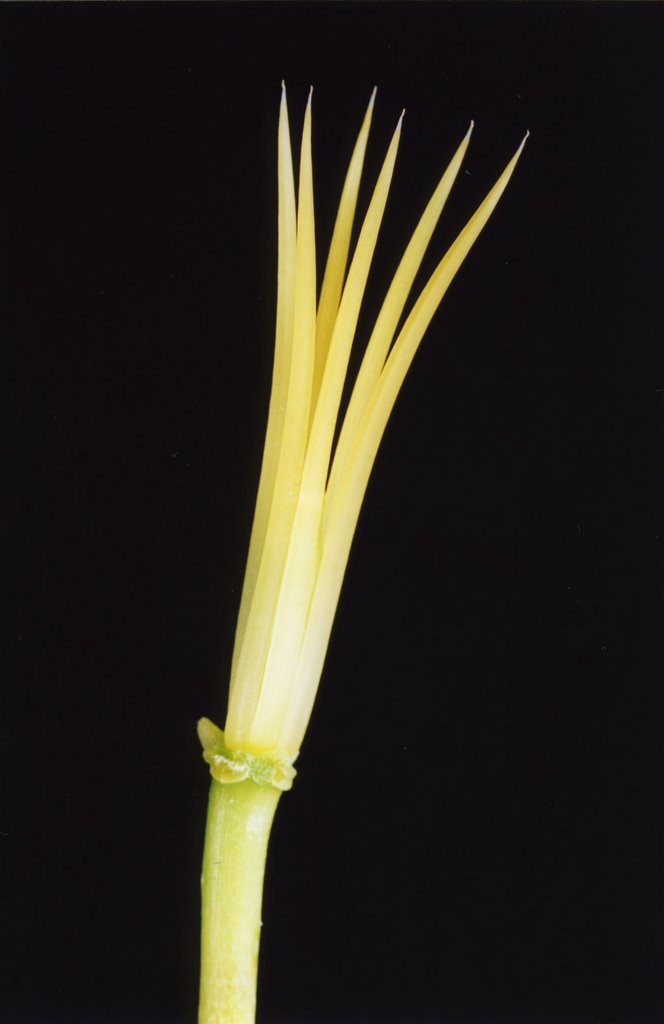
Inside the Lily – Yesterday’s Take a Guess
Camera - Minolta Maxxum 7000
Film - Fuji Superia ISO 200
Shutter Speed - 1/3 -1 EV
Aperture Setting - f-13 Aperture Mode
Lens - Sigma 105mm macro/portrait lens
31mm extension tubes
12 inch collapsible reflector
Scanning Method - Epson Perfection 4990 Photo scanner
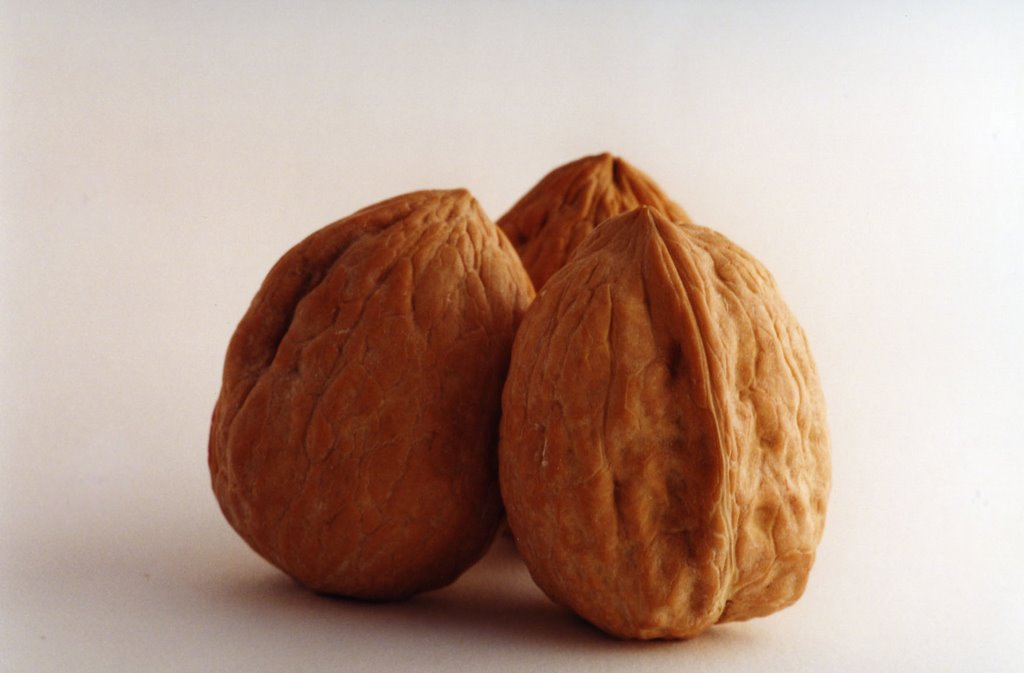
Walnuts in a Lightbox 1
Camera - Konica Minolta 70
Film - Fuji Superia ISO 100
Shutter Speed - 1/3
Aperture Setting - f-19 Aperture Mode
Lens - Sigma 105mm macro/portrait lens
Homemade Lightbox
Scanning Method - Epson Perfection 4990 Photo scanner
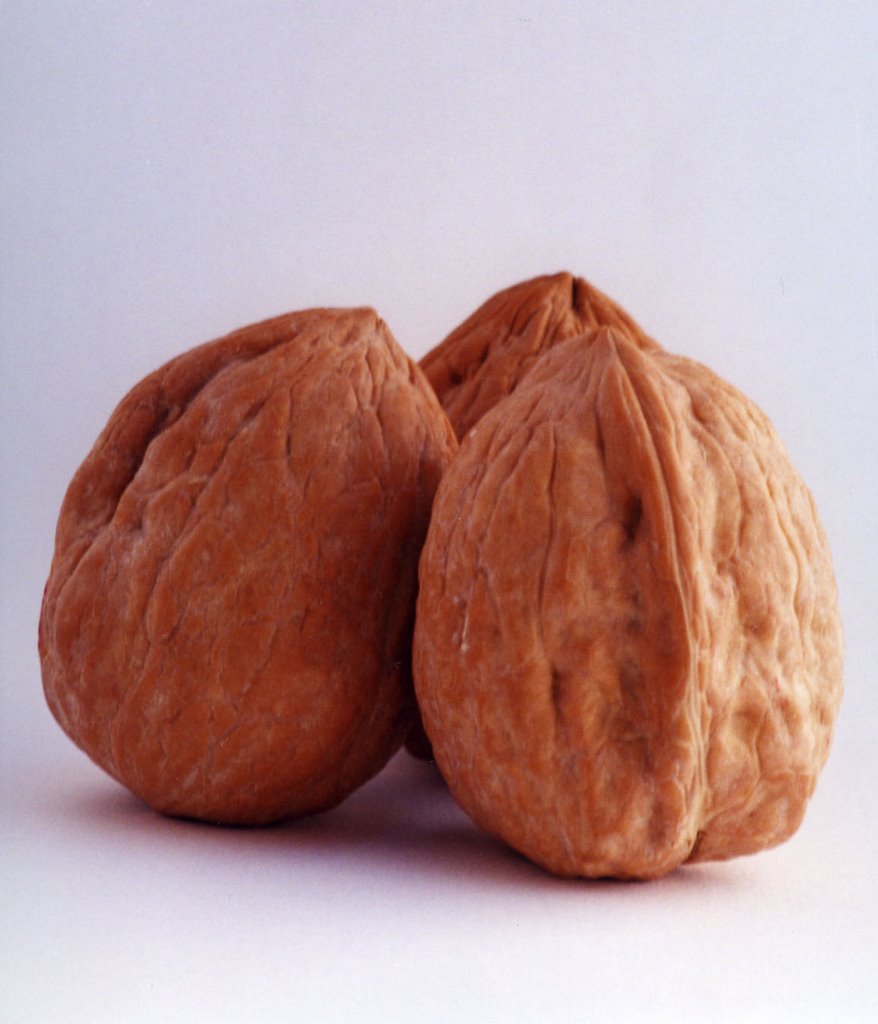
Walnuts in a Lightbox 2
Camera - Konica Minolta 70
Film - Fuji Superia ISO 100
Shutter Speed - 0.5 seconds
Aperture Setting - f-19 Aperture Mode
Lens - Sigma 105mm macro/portrait lens
Homemade Lightbox
White cardstock reflector card
Scanning Method - Epson Perfection 4990 Photo scanner
Cropped off the top of this image
It is hoped that you would respect my ownership of the images posted here on Shutterbug Underexposed, despite the ease with which you could copy my photos. If you would like a true photographic print of any of my images, please contact me at goodiesbaker@yahoo.com and I will be happy to provide you with one.
Yesterday’s image was the filaments of a lily plant with the anthers and pistil removed.
Late post today. My husband had the day off (even though he went in anyway – but he slept in some) and I went out to shoot a little more of my Efke film. It was very warm out again, 54F when I left and we should get to about 75 today. We’ll be down to 27 tomorrow night, so I’m going to enjoy this while I can.
A couple weeks ago I mentioned a light box I made one Saturday afternoon. I got the instructions from the Strobist website. I had a really good sturdy box on hand and some sheets of plastic that we gals would make stencils from when scrapbooking. They happened to be the perfect size for the holes I had cut in the box, so I had mine finished in about twenty minutes. I set it aside and later that afternoon I noticed the sunlight coming onto the front porch at a very nice angle. So, I used natural light for these shots, just as a test to see how the box worked. I was very pleased with how the lighting came out. It was coming in through the side panel and maybe a bit from the top panel. I used a white reflection card on the side opposite the direction of the direct lighting on the second shot. I cropped that one because some of the card showed up in the corner. I was already losing my light behind the trees in front of the house, as you can see from the longer exposure, even with the reflector card, and the blueing of the light. I’ve since taken some shots using a flash placed outside the box, as he instructs in his lesson. I look forward to seeing those results. I’m also going to make a larger box. The panels on this one are 8x12 on the sides and 12x12 on the top. The top panel is covered with vellum paper, just because I ran out of stenciling plastic. If you can take your flash off of your camera, this is a great project to try, and it costs almost nothing to make.
Nicely done. Interesting composition. I've been planning on making a lightbox too but I haven't gotten around to it yet. It looks like it worked pretty well.
Excellent pictures. I'm glad to hear that your lightbox is working out so well.
You made a good work with your light box . It's a good way to shoot close up. Here the light is very soft making no shade.
I thik i'm going to build one like you Micki.
Have a nice day.
Are you cold at the moment in your place?
I think a lightbox would help with my photos for Ebay selling. Thanks for the instructions and suggestions.
very interesting and fruitful experiment....gives it a very atmospheric and soft light..
I can tell that you'll be making great use of your DIY lightbox - love the warmer, wide shot!
Hehe I don't think I'll ever fully mature in the mental sense, nuts in a lightbox made me chuckle.
I got a large translucent bucket (about 3 ft diameter) from a hardware store possibly Home Depot and cut a hole in for lens access and either use it outside or fire a flash trhough it like a light tent. Works pretty good. and very cheap. I shall refrain from any jokes about this shot but I do like you nuts... so to speak!
I remembered your mention of the lightbox project and these are interesting results. The ultimate test will be something glossy like porcelain . . such objects are impossible to photograph in ‘standard’ ways. Experiment is good : sharing the results is even better! Thank you.
Very nice. I really like the nuts and how it came out. Nice job!
I Need to do some light box stuff, too! :)
great job with the homemade light box, that strobist site is wonderful, I want Pocket Wizards!
When it comes to a lightbox I like the subject to be bathed in a pure white. OR, with one very prominent shadow. I like these but would prefer a pure white background. Still, great texture!
A very nice job on the light box the light is nice and soft and produces a good image. I've not seen the strobist site before thanks for the link
The pics shows the efforts you have taken to take such beautiful macros.
Execellent shots...especially the walnut shots have well shot & composed!
It sounds like the name of photoblogging comedy :) As usual you're inspiring me to finish making my lightbox. Well you've nudged me closer anyways :)
That first macro is excellent. So clean and minimal.
Post a Comment
<< Home